

The steps in pictures
Flow drops, or the date comes. Right looks like this: Clean when the flow drops, and check on the manual’s schedule even when it looks fine.
Rinse in tank water. Right looks like this: Sponges and media rinsed in a bucket of old tank water, never under the tap.
Keep the bacteria. Right looks like this: Worn floss, cartridges and carbon replaced; the biological media kept, never all changed at once.
Restart and watch. Right looks like this: Primed if it needs it, flow back to normal, and no leaks.
What to rinse and what to replace
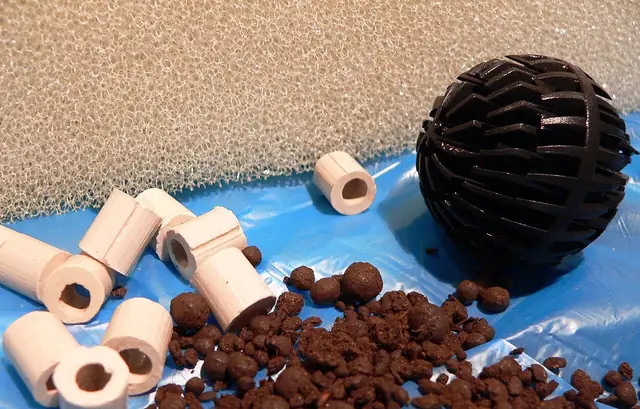
The job depends on the type. A reusable sponge is squeezed out in tank water and goes back. A canister’s baskets come out, are rinsed and go back in the same order. A hang-on-back cartridge catches dirt but also holds bacteria, so replacing it removes part of the biofilter: change it when its maker says, but leave any sponge or bio-insert in place and only rinse that.
Keep cleaning and replacing apart. Fluval’s 07 Series manual says to rinse biological media in aquarium water, to replace chemical media because it cannot be cleaned, and never to replace all the media at the same time, staggering changes so some older media stays in use. Its schedule sets checks and replacements from monthly to yearly, including a new impeller and motor-head gasket every year. Other filters have their own; our filter pages list each model’s media and care steps. What each medium does
Before you open it
Unplug the filter before you touch it. Put a towel down and fill a bucket with water from the tank: that is what you rinse the media in. If the work will lower the waterline below the heater’s minimum mark, unplug the heater too and let it cool in the water for the time its manual gives (30 minutes for Aqueon’s) before it comes out.
For a canister, close the valves or the tap block before you undo the hoses, so the hoses stay full and nothing siphons onto the floor. Then lift the canister out to somewhere with room to take the head off; a cabinet it fits into is often too tight to open it in. Lay the baskets out in the order they came out, so they go back the same way.
Use the right parts for your model
Seals, O-rings and impellers are made for one model or one family. Order them by your filter’s name and model number, and check the maker lists the part for your model. When the flow drops, take out the impeller and brush it and its well clean; a chipped or worn impeller rattles and is replaced, not glued. Grease an O-ring only if the manual says to, and only with what it names.
Replacing cartridges on a schedule does not mean replacing ceramic rings or sponges on one. Those are rinsed and kept, and replaced only a part at a time, when the maker’s schedule says.
Restarting the filter
Put the media back in its order, check the O-ring sits clean in its groove, close the head, reconnect and open the valves. Prime the filter the way its manual says, then plug it in. Watch it for a few minutes: water should flow from the outlet, the noise should settle as air works out, and no joint should drip. A filter that hums but moves no water is not running: unplug it before you open anything, then prime it again.
If it still will not move water, or grinds or rattles after the manual’s checks, stop and contact the maker. Never open a powered pump or the sealed motor; a damaged unit is replaced, not patched. Troubleshooting by symptom